
Outdoor Cooking Fireplace: Step-by-Step Installation Guide

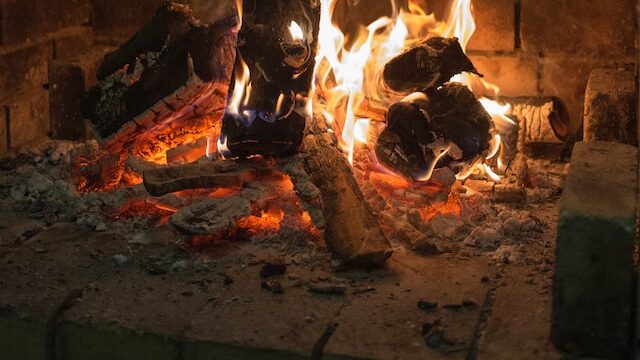
Aside from being a great space for cooking, an outdoor cooking fireplace is also a statement piece for your backyard. The ambiance provided by the fireplace makes it more inviting. It lets you escape the confines of your kitchen walls and enjoy the open air. You have more space to move around and manage your cooking. It’s also a different experience to cook outdoors and enjoy the company of friends and family.
Steps to Install an Outdoor Cooking Fireplace
Choose the Right Location
More than picking a place that looks good for your outdoor cooking fireplace, there are a few things to consider. First, you want to ensure it’s at a safe distance from your home, sheds, or any other structures to minimize any fire hazards. Think about the direction of the wind in your area. Setting up your fireplace in a location where the wind will blow the smoke away from your seating area and home is a smart move. Choosing a spot that has a great view of the rest of your garden, a water feature, or the horizon can enhance the entire experience.
Selecting Materials
Once you’ve got your location locked in, it’s time to think about the materials. This is where your outdoor cooking fireplace starts taking shape, and your choice of materials can influence both its functionality and appearance.
Brick vs. Stone: What’s Better?
Brick or stone? Both are fantastic choices, but they come with their own sets of advantages.
Brick: Bricks are often a bit more affordable and give a classic, clean look to your fireplace. They’re durable and can withstand high temperatures, which is obviously important for a fireplace. And if you’re going for a neat, symmetrical look, bricks are your best bet.
Stone: If you’re aiming for a more rustic or natural vibe, stones are the way to go. They blend with outdoor environments, especially if you have a garden or natural landscaping. But keep in mind that they might be slightly more challenging to work with than bricks.
Importance of Insulation
Now, you might be thinking, “Insulation? In an outdoor cooking fireplace?” Yep, you heard right. Insulation plays a crucial role in ensuring that your fireplace is safe and efficient. Insulating materials help direct the heat upwards, which is essential in preventing ground fires or damage to the base of your fireplace. It also ensures that your fireplace retains heat more effectively, giving you the perfect cooking temperatures without wasting too much fuel.
Materials Needed
Materials for the Foundation
| Material | Amount | Purpose |
| Concrete | Approximately 0.5 to 0.75 cubic yards for a standard 6’x6’ fireplace foundation with a depth of 12 inches | Main structural base for the fireplace |
| Gravel | Around 0.25 cubic yards for a 6’x6’ foundation pit (3-inch layer) | Aids drainage beneath the concrete |
| Rebar or Mesh Wire | 6-8 pieces of 10-foot rebar or one roll of mesh wire | Reinforces the concrete slab |
| Form Boards | Four 8-foot 2x4s | Molds the concrete during pouring |
| Concrete Mix (Optional, if not using ready-mix) | 20-25 80lb bags for a 6’x6’ foundation | For preparing concrete |
| Water | As required by concrete mix instructions | For mixing concrete |
| Plastic Sheeting or Wet Burlap | Enough to cover the foundation surface | Keeps concrete moist during curing |
Materials for Constructing the Fireplace
| Material | Amount | Purpose |
| Bricks or Stones | Depending on the size and design, approximately 500-700 bricks or stones for a standard fireplace | Main building material for the fireplace structure |
| Firebricks | 50-100 bricks | For constructing the firebox due to their ability to withstand high temperatures |
| Fire-Resistant Mortar | 3-5 bags (50 lb each) should suffice for a standard fireplace | Binds the bricks/stones together and can endure high temperatures |
| Metal Grate | 1 | Where you’ll place the logs or charcoal for cooking |
| Chimney Flue (Optional) | 1-3 sections, depending on desired height | Directs smoke upwards and away |
| Fireplace Door or Screen (Optional) | 1 | Safety feature to prevent sparks or logs from coming out |
| Mantel (Optional) | 1 | Decorative and functional shelf-like projection above the fireplace opening |
Tools Required (for both foundation and construction):
Shovel
Wheelbarrow
Trowel
Builder’s level
Hand tamper or mechanical compactor
Mixing tools (if mixing concrete manually)
Masonry saw (for cutting bricks or stones if needed)
Safety gear: gloves, safety glasses, etc.
While this list provides a comprehensive overview, it’s important to note that actual amounts may vary depending on your specific design, local conditions, and preferences for your outdoor cooking fireplace. Consulting with a local expert or contractor can give you a more precise understanding of quantities needed for your unique project.
Setting the Foundation
The foundation is, quite literally, the grounding force behind your outdoor cooking fireplace. It supports the weight of the fireplace, ensures its stability, and prevents any potential sinking or tilting. Here’s a deeper dive into laying the foundation:
Site Selection and Preparation
Marking the Area: Before digging, you need to mark the area where your fireplace will sit. You can use stakes and string to outline this space. It helps in getting a clear idea of the dimensions and ensures you’re working within the desired limits.
Clearing the Space: Remove any grass, plants, or debris from this area. You want a clean slate to begin your work.
Digging the Pit
Depth Matters: Your pit should be approximately 12 to 15 inches deep. This depth ensures adequate space for both drainage gravel and the concrete layer, providing a solid base for the fireplace.
Keep it Even: While digging, ensure the base remains level. This evenness is crucial for the stability of the concrete slab you’ll pour in.
Drainage Layer
Gravel Base: A 3-4 inch layer of gravel acts as a drainage system. This is especially helpful in preventing water accumulation underneath the concrete. When water accumulates and then freezes during winter, it can cause the concrete to crack. Gravel prevents this by allowing water to flow away from the foundation.
Compaction: Once the gravel is laid, compact it down. This can be done using a hand tamper or a mechanical compactor. Compaction ensures the gravel layer is firm and doesn’t shift when you pour the concrete.
Concrete Pouring
Mixing the Concrete: You can opt for ready-mix concrete or mix it yourself following the manufacturer’s guidelines. The consistency should be such that it can be poured but isn’t too watery.
Pouring the Slab: Pour the concrete into the pit over the gravel layer. It should fill up the remainder of the pit’s depth, giving you a thick, sturdy slab.
Smoothing it Out: Use a trowel or a long 2×4 to level the surface of the concrete. It’s important to ensure the surface is smooth and level, as any unevenness can create problems when you start constructing the fireplace.
Curing the Concrete
The Waiting Game: Once poured, concrete needs time to cure and harden. This isn’t just about it drying out; the curing process strengthens the concrete.
Moisture is Key: For optimal strength, the concrete needs to remain moist while curing. You can achieve this by covering it with plastic sheeting or wet burlap. Regularly sprinkle water over the slab for at least 3 to 5 days.
Time: Ideally, wait for a week before you start building on the concrete foundation to ensure it’s fully set and at its maximum strength.
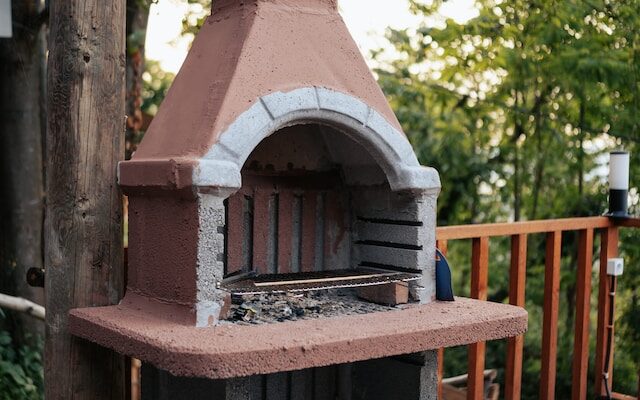
Constructing the Fireplace
With a solid foundation in place, you’re now ready for the exciting part – building the fireplace itself!
1. Blueprint: Before diving straight in, have a design or blueprint in mind. It’ll guide you on how high or wide the fireplace should be and where special features, like a chimney or an alcove for wood storage, should go.
2. Laying the First Layer: Start by laying your bricks or stones on the foundation. Use a fire-resistant mortar to bind them together. This kind of mortar is designed to withstand high temperatures, so it’s perfect for our purpose.
3. Building Up: As you stack more layers, ensure each brick or stone is aligned properly. Periodically check with a level to ensure everything’s straight. Remember, consistency is crucial here!
4. Creating the Firebox: The firebox is where the actual burning happens. You’ll want to construct this section using firebricks, which are specially designed to handle the intense heat of direct fire. Regular bricks or stones can crack under such temperatures.
5. Chimney Time: Depending on your design, you might want to include a chimney. This helps direct the smoke upwards and away from your cooking and seating area.
6. Final Touches: Once the main structure is up, you can add any additional elements or decorative touches. Maybe a mantel? Or some decorative tiles?
Installing the Grate
The grate supports the logs or charcoal and serves as the platform on which you’ll place your pots, pans, or grill rack for cooking.
Choose the Right Grate
Material: Cast iron or heavy-duty stainless steel grates are ideal. They can withstand high temperatures and are durable. Cast iron, especially, retains heat well and offers an even cooking surface.
Size: Ensure the grate fits well within the dimensions of your fireplace. It should be large enough to cover a significant portion of the firebox but with enough space on the sides to allow airflow and easy placement or removal.
Positioning
Height: The height at which the grate is positioned will influence the heat intensity on your cookware. Typically, adjustable grate brackets or built-in ledges on the inner sides of the fireplace are used. This way, the grate’s height can be modified depending on what you’re cooking. For intense heat, position it closer to the coals, and for slower, more prolonged cooking, raise it higher.
Orientation: Ensure the grate is placed level. An uneven grate can lead to uneven cooking and can be a hazard if pots and pans are placed on it.
Securing the Grate
Some fireplaces come with built-in slots or brackets where the grate arms can rest securely. If yours doesn’t, consider installing metal brackets or ledges. These not only help in positioning the grate but also provide stability, ensuring it doesn’t shift during cooking.
Safety Precautions
It is important to ensure safety while installing and using your outdoor cooking fireplace. After all, while we all love a good BBQ session, nobody wants it marred by accidents or mishaps:
Proper Ventilation
When it comes to fire, ensuring proper ventilation is non-negotiable.
1. Chimney and Flue: If your fireplace design includes a chimney, it’s there for a reason. The chimney helps guide the smoke upwards and away, preventing it from billowing out into your outdoor seating or cooking area. Ensure the flue inside the chimney is operable. This lets you adjust the draft, regulating airflow and ensuring efficient burning.
2. Air Vents: Some fireplace designs incorporate vents at the base. These provide oxygen to the fire, facilitating combustion. Just make sure they’re not blocked or obstructed, especially when the fire is lit.
3. Smoke Direction: Always be mindful of the smoke’s direction, especially if you’ve got guests around or if there are neighboring houses close by. While the aroma of grilled food is enticing, continuous smoke blowing their way isn’t pleasant.
Safe Cooking Practices
Having an outdoor cooking fireplace is fantastic, but using it responsibly ensures everyone enjoys the experience.
1. Never Leave Unattended: Whether you’re just starting the fire or in the middle of a slow roast, never leave your fireplace unattended. Fires can be unpredictable, and it’s always best to be around to monitor and manage any unexpected flare-ups or shifts.
2. Use the Right Tools: Always use long-handled tongs, spatulas, and other BBQ tools when cooking. They keep your hands at a safe distance from the flames and hot coals.
3. Fire Extinguishing Methods: Always have a fire extinguishing method on hand. This could be a fire extinguisher, a bucket of water, or sand. Remember, water isn’t suitable for grease fires, so having a multipurpose fire extinguisher nearby is a smart move.
4. Keep Kids and Pets Away: Children and pets are naturally curious. Always supervise them around the fireplace to ensure they don’t get too close or accidentally knock over any tools.
Conclusion
Installing an outdoor cooking fireplace is a multifaceted process. Beginning with selecting an appropriate location and the right materials, laying a robust foundation is key. The choice between brick and stone can influence both aesthetics and functionality. The importance of insulation cannot be overstated, ensuring efficient heat direction and safety. A well-installed grate is central to the cooking process, while safety precautions, particularly ensuring proper ventilation and adhering to safe cooking practices, are essential for enjoyable and hazard-free use. With proper planning and execution, an outdoor cooking fireplace adds significant value and utility to your outdoor space.
FAQs
1. What’s the optimal size for an outdoor cooking fireplace?
The ideal size depends on your backyard space and cooking needs. A standard size is around 6’x6’, but you can go bigger for more cooking space or smaller if your backyard is limited in size.
2. How often should I clean and maintain my outdoor cooking fireplace?
After every major use or cookout, it’s good practice to remove ash and clean the grate. For a more thorough cleaning, including the stones or bricks and chimney (if present), once a month is recommended, or as needed based on usage.
3. Can I convert my existing regular outdoor fireplace into a cooking one?
Yes, with some modifications like adding a suitable grate and ensuring proper ventilation, most regular outdoor fireplaces can be converted for cooking purposes. It’s advisable to consult with a professional to ensure safety and functionality.
4. Is a chimney necessary for an outdoor cooking fireplace?
While not always mandatory, a chimney is beneficial as it directs smoke away, especially if the fireplace is near a seating area or your home. It also aids in better draft and combustion.
5. What safety measures should I have in place while using my fireplace for cooking?
Ensure the fireplace is stable and built on a firm foundation. Always have a fire extinguisher or water source nearby. Use long-handled tools for cooking, monitor children and pets, and make sure the fire is fully extinguished after use. Proper ventilation and avoiding overloading the fireplace with too much wood are also vital for safety.


